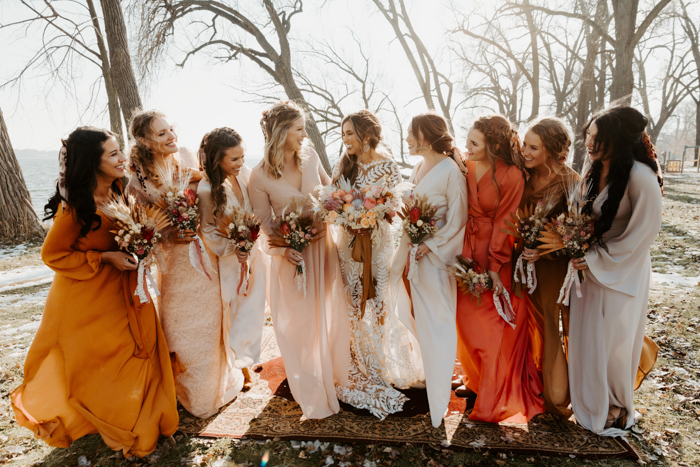
 Image by Erika Diaz. See more of this real wedding here.
We know how much work goes into planning a wedding. Figuring out guest lists, seating charts, catering, the venue, etc. can be extremely overwhelming. On top of wedding planning, more couples are choosing to opt for DIY décor. Whether you’re looking to get crafty to save money or you just want to put personal touches into your special day, there’s a lot to know about hosting the DIY wedding of your dreams.
Planner Vs. No Planner
Here at Junebug, we can’t recommend wedding planners enough. While they may seem like an extra expense upfront, they can save you money in the long run. They keep you on track, execute your vision, manage the budget meticulously—including finding discounts when possible–and execute day-of coordination so you can be present with your partner. They also make things a whole lot less stressful.
If hiring a wedding planner is not practical or possible for you and your spouse, consider hiring a day-of coordinator. Rather than help you plan throughout the entire process, they will help coordinate everything you have put together yourself. This allows you to sit back and relax and enjoy your wedding day as much as possible.
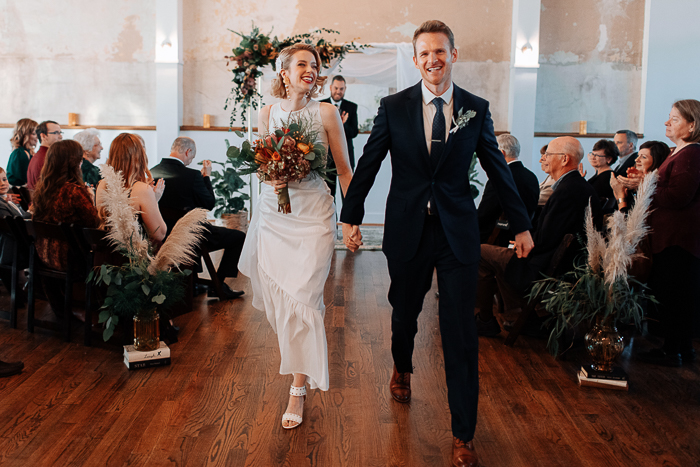 Image by Swak Photography. See more of this real wedding here.
Tips + Tricks For Planning a DIY Wedding
As you set off to create your perfect DIY wedding keep these tips and tricks in mind. You’ll be glad you did.
Create A Mood Board
We’re firm believers that every couple should create a wedding mood board when wedding planning. They help guide decisions and keep your holistic vision in mind while also visually describing your desires to your wedding team.
They’re especially handy when DIYing items at your wedding because they serve as inspiration. Have you found a centerpiece that you want to recreate? What about a backdrop that you absolutely have to have? Tackling these items will be much easier when you have images to refer to.
Recruit Help From Your Wedding Party and Family Members
For the sake of your sanity, ask for help. Your wedding party and family members are there to make your special day just that–special! Get together and make DIY projects fun with movies, snacks, and wine. This way you’re crossing things off of your list quicker and making them more enjoyable for yourself.
Consider Thrift Stores
Weddings, while of the most memorable days of your life, are also incredibly wasteful. Unwanted décor gets tossed time and time again. Not only is this a waste of money, but it’s also harmful to our planet. For a more sustainable and budget-friendly option, consider sourcing items from thrift stores, your home, or apps like Facebook Marketplace and Offer Up. You’ll be surprised by the stunning vases and artwork you can find secondhand.
Play To Your Strengths
While it may be tempting to DIY everything you need, it will quickly become a big waste of your time and money if something goes wrong. Of course, you can pay a world-class vendor to correct mistakes at the last minute. Then you’ll be met with stress and another bill you didn’t plan for.
Focus on your strengths—whether they are sewing, baking, drawing, calligraphy, floral design, etc. The same goes for the family and friends that you include in your projects as well.
DIY Wedding Inspiration
Invitations
While invitations are a small part of your special day, they can be expensive. Who knew that paper and printing costs could add up so fast? Luckily, there are many different options when it comes to invites and stationery. Often, the most cost-efficient option is to do your own designing and printing. However, this can be very time-consuming.
If you don’t consider yourself a graphic design pro, online options such as Minted or Shutterfly offer gorgeous templates at reasonable prices. They both frequently offer discounts as well.
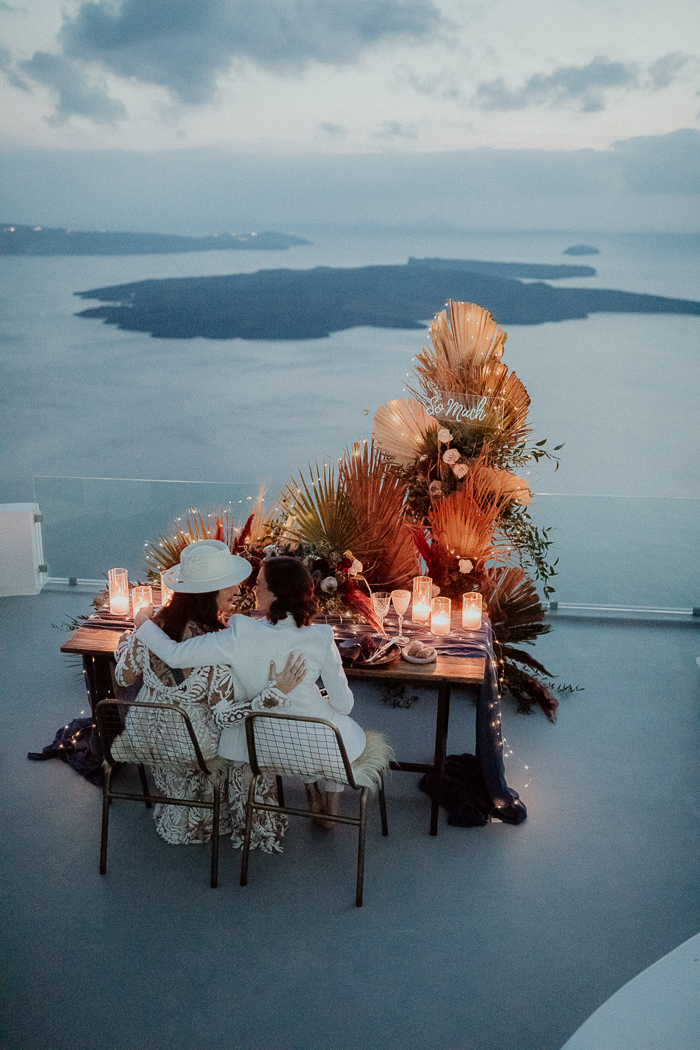 Image by Louis Gabriel. See more of this real elopement here.
Lighting
One thing that can really take a wedding up a notch is custom lighting–which doesn’t come cheap. Everything from the bulbs you use to where your candles are placed can make or break your wedding. Sound dramatic? It’s not.
Wedding lighting will help people see where they’re going and light the wedding photos you’ll cherish forever. With proper lighting, you can keep the party going even after the sun sets.
There are many options when it comes to lighting that you can easily create yourself. It’s important to keep the lingo in mind so you don’t end up with bright beams when you were really dreaming of a soft natural ambiance. Here are a few of the most popular options for that perfect glow:
- Uplights. Uplighting is created when lights are placed on the floor and turned upwards towards the ceiling to create a soft glow. Many venues will offer this as a premium, but at $1,000-$3,000, it’s not the cheapest upgrade. That’s where DIY Uplighting comes in. For only $17 a light, you can save hundreds of dollars by renting these multi-colored LED lights. Once your wedding is over, repack all of the lights and drop them back off to USPS with the prepaid shipping label. It doesn’t get much easier than that.
- Ceiling of lights aka Twinkle Lights. If your wedding is taking place outdoors, a “ceiling” of lights is an incredibly easy way to add a romantic touch while keeping things lit. They create the look of a starry night even when the sun is setting. Hang these stringed lights from trees, tent corners, etc.
- Lanterns. Lanterns look beautiful in open-air tropical settings. You can find a pack of 5 paper lanterns for under $15 on Amazon!
- Candles. Candles are one of the easiest ways to make a space feel warm, welcoming, and picturesque. They’re also extremely budget-friendly. If you’re afraid of having open flames, combine flameless tealights and tapered candles throughout your space.
- Hanging lights. Hanging large pendants–such as Edison bulbs–from greenery, arches, and tree branches instantly upgrades an outdoor seating area and provides an intimate glow.
Signs
Having various wedding signs posted around your wedding is helpful for your guests. Wedding signs can communicate your ceremony schedule, direct parking, welcome guests, or showcase a specialty cocktail. You can create your own DIY signs using wood, glass, old window panes, or chalkboard–to name a few.
There are a few things to remember when creating the signage for your nuptials:
- Consider the lettering. Are you a pro calligrapher? Try your hand out! If you’re not comfortable, try using stencils. You can also use decals using a Cricut machine. This takes away the guesswork of hand-painting.
- Your Color Palette. Signage is one of the easiest ways to incorporate your wedding colors. If you’re looking for ways to add a pop, this is it.
- Be Unique. While it may be tempting to recreate a sign that you found on Pinterest, be sure that it matches your wedding’s style, theme, and colors. Don’t copy it just because you think it’s cute.
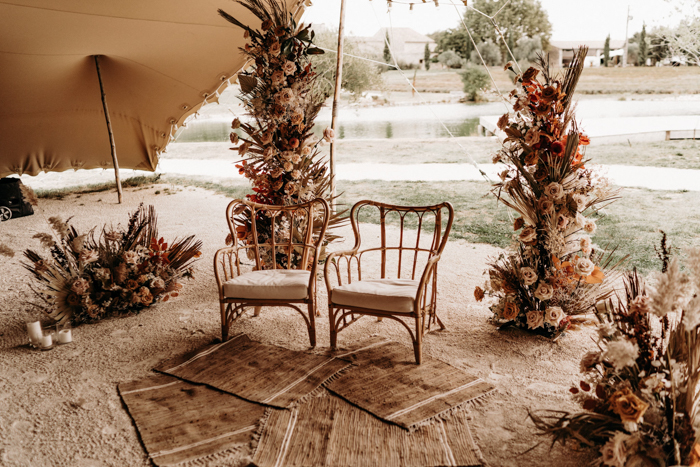 Image by Lorenzo Accardi. See more of this real wedding here.
Florals
Florists train for years and know flowers inside and out. That’s what makes them so good at their jobs. While it may seem simple to throw a few flowers together and call it a bouquet, it requires a lot more work than that.
However, if you’re creative (and very patient), you can create your own floral arrangements. To succeed, we have a few pieces of advice.
- Keep it simple. Arranging florals is a science. You might be a pro at arranging flowers for your home but creating dozens of centerpieces, bouquets, and other arrangements is tricky. Think lots of greenery, small jars or vases, and one or two types of flowers.
- Consider the season. You may have your heart set on a particular bloom for months but consider the season your wedding takes place in. If that flower is not in season but you consider it a must-have, DIYing your florals is not a wise decision–as this may require importing flowers.
- Think about your clothing. Colorful flowers with deep hues, berries, or pollen can stain your clothing. The last thing you want is a large red stain on your dress before the ceremony even begins.
- Take a workshop. This is the most crucial piece of advice that we can give you. Before you start arranging, take a workshop or two. Make a day of it with your wedding party and learn different techniques that you can use for your special day. They’re informative but—most importantly—fun! It may also be smart to watch a Youtube video or two.
Centerpieces
Centerpieces are one of the most visual parts of your wedding reception. They are also one of the most challenging because there are so many of them. If making dozens of floral arrangements overwhelms you, there are many different options for centerpieces.
There’s no rule that says centerpieces have to be flowers, after all! Include items that are special to you and your spouse, such as books, mismatched glassware, lamps, lanterns, or geometric table décor.
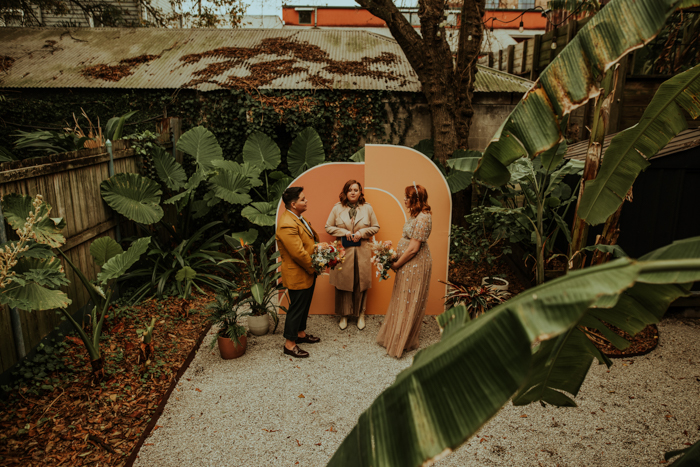 Image by Maggie Grace Photography and Summer Leigha Photo. See more of this real elopement here.
Backdrops
Your backdrop serves as a focal point and frames the most important part of the day—the ceremony. It also happens to be a great canvas to flex those creative muscles. Some of our favorites wedding backdrops include:
- Drapery
- Floral installation
- PVC pipe arch
- A free-standing wooden wall
- Strips of multi-colored fabric
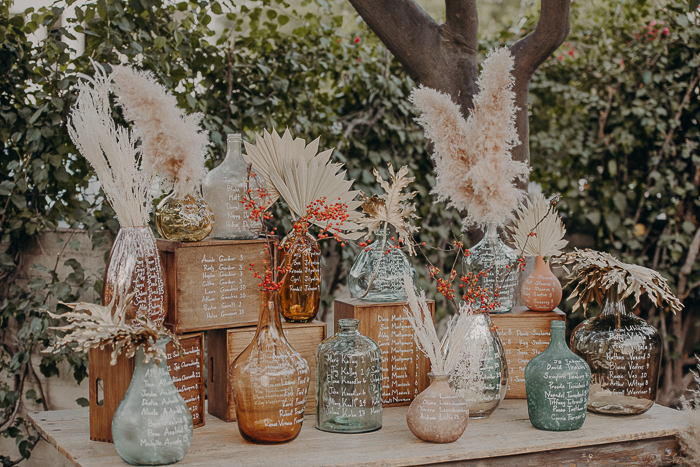 Image by Isaiah and Taylor Photography. See more of this real wedding here.
Seating chart
Your seating chart is one sign that your guests are guaranteed to look at, so it’s important that it matches your color palette and theme flawlessly. Whether you’re looking for elegant, bohemian, or rustic, there’s a DIY option. Here are a few of our favorites that have been put together by our real bride and grooms:
- Alisa and Phil thrifted multi-colored vases and hand wrote their seating chart on these vases before filling them with painted gold palm leaves
- Tanya and Nick DIY’d their wooden seating chart and Tanya even learned how to macrame so she could frame the chart!
- Ashley and Connor created a retro color-blocked seating chart that perfectly matched their light pink and orange color palette.
Photobooth
Photobooths are one of the easiest additions to create for your wedding and they make great wedding favors. You don’t need fancy equipment or an expensive team to make the perfect photobooth.
If you want your guests to strike a pose, follow these six tips to create a photo booth that will fit your design aesthetic and won’t bust your budget!
- Get creative with the backdrop. Your backdrop should not be complicated. It can be anything from a faux flower wall put together on plywood boards to a chalkboard to a neon sign to macrame.
- Light it up as much as possible. Unless you’re a pro photographer, you’re better off not fiddling with your camera’s flash and exposure settings. Instead, make sure that your photo booth area is very well-lit. If using lights or lamps of some sort, use bulbs that are marked for “daylight.” You’ll find that these have a color temperature of about 5000k.
- Set it up in a highly visible place. The whole point of a photo booth is to capture fun moments with your guests. They can’t do that if the booth is hard to find. Try to avoid tucking it in a corner or putting it in a separate room. Instead, think of it as another focal point in your reception design.
- Use props. The more props, the better. Etsy is great for finding signs, cutouts, masks. You can also find other goodies such as hats, wigs, jewelry, and other accessories at thrift stores or costume shops.
- Create a hashtag. We’re sure you’ve heard of wedding hashtags by now. It’s one of the easiest ways to be able to collect all of the photos taken by your guests. There’s a likely chance that they will share their photo booth pictures on social media so having a hashtag that they can use will make finding them a piece of cake.
- Use a polaroid camera. If you’re looking for a low-tech way to have physical copies of your guests’ photos, encourage the use of polaroid cameras. Once printed, have them tape them into a guestbook or place it in a box. You can also use a polaroid printer to print photos off of your guests’ smartphones. Whichever route you decide on, be sure to have plenty of extra batteries and film on hand.
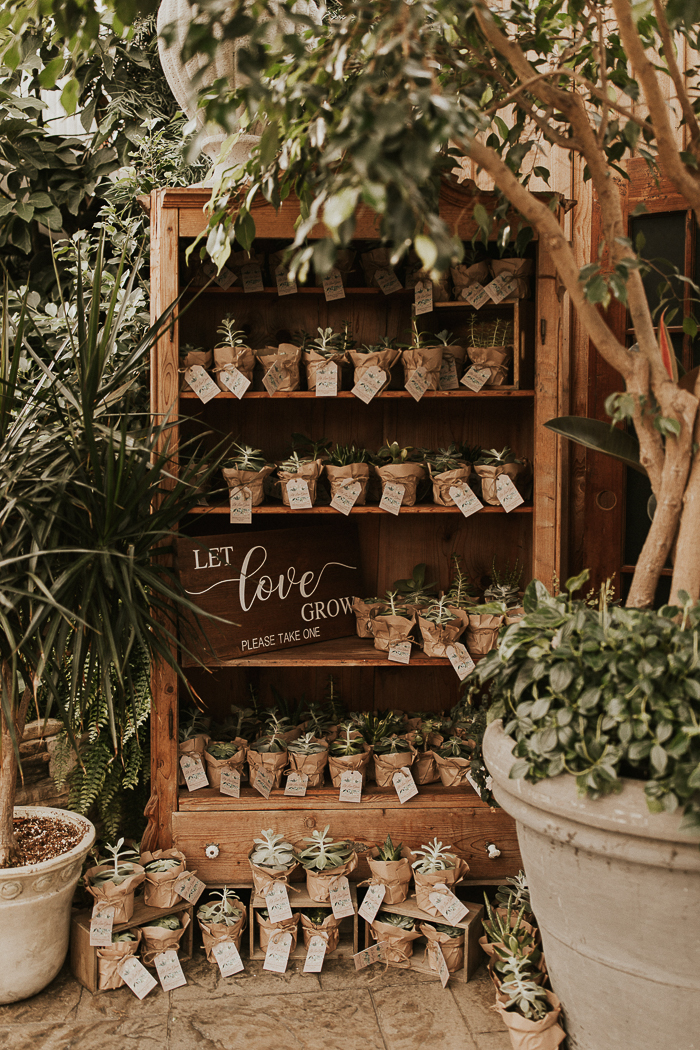 Image by The McLachlans. See more of this real wedding here.
Favors
Wedding favors are the simplest item to DIY for your wedding. Rather than spend money on a favor that your guests are going to be too tired or drunk to remember, thank your friends and family for attending with one of these DIY options:
- Homemade candles
- Bath soak
- Soap
- Jam or honey
- Hangover kits
- Succulents
- Baked dessert (cookies, candy, brownies, etc.)
- Wildflower seeds
- Mini bottles of alcohol (champagne, your favorite liquor, canned wine, etc.)
- Hot chocolate kits
Whatever it is you decide to give, make it true to who you are as a couple—whether it ties in with your heritage, favorite snack, etc—and matches your theme. That way you’ll avoid giving something random that you think guests may or may not potentially enjoy.
Whether you’re working with a tight wedding budget or you simply enjoy the endless possibilities that DIYing brings, there are many ideas you can incorporate to create the DIY day of your dreams. We hope this guide inspired you and that you’re ready to tackle any project you’ve been thinking about.
Want to see these do-it-yourself details in action? Check out some of our DIY real weddings!
The post DIY Wedding Guide: Everything You Should Know to Plan Your Own appeared first on .